How to Draw an Iris Flower Step by Step

Many people admire the beauty and uniqueness of irises. There are numerous varieties of iris flowers. They significantly differ in color and shape of petals, but all of them are beautiful. Today we will draw the irises together and create great sketches that will help us draw wonderful paintings with irises in the future.
Contents
- 1 Materials for This Art Lesson
- 2 How to Draw the Irises Step by Step
- 2.1 The Stems and Direction of the Leaves
- 2.2 Draw the Iris Petals
- 2.3 Improve and Add the Details
- 3 Video Tutorial – How to Draw the Irises Step by Step
Materials for This Art Lesson
- graphite pencils of different hardness
- eraser
- paper for sketches
- red chalk or sepia to refresh the painting
How to Draw the Irises Step by Step
Today we will draw several iris flowers in different foreshortenings. Let`s consider the iris arrangement so that in the future you will be able to draw these flowers without any difficulties.
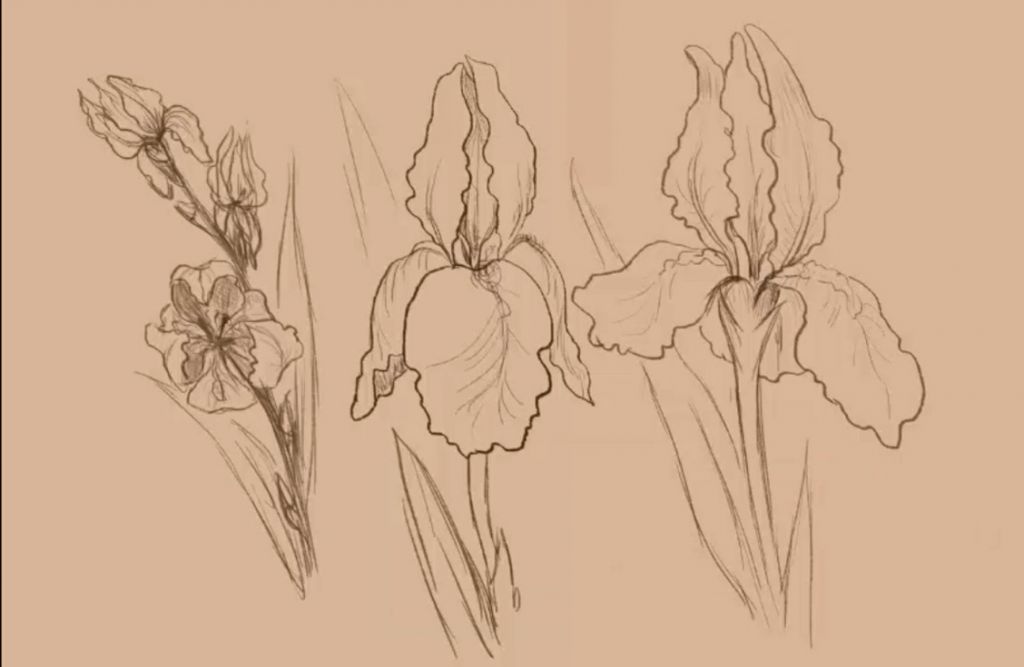
Let`s look at the picture which you should get at the end of this fine art lesson.

The Stems and Direction of the Leaves
The iris stems are quite thick and strong. Most often there are several big buds on one stem and sometimes they bloom almost simultaneously.
The majority of irises have nine petals. Three of them bend down to the ground and other strain towards the sun almost closing the center of a flower. Locate them one by one: one petal – up and another one – down.

Outline the stems and the lines, which show the direction of petals, very slightly and barely noticeably.
Draw the Iris Petals
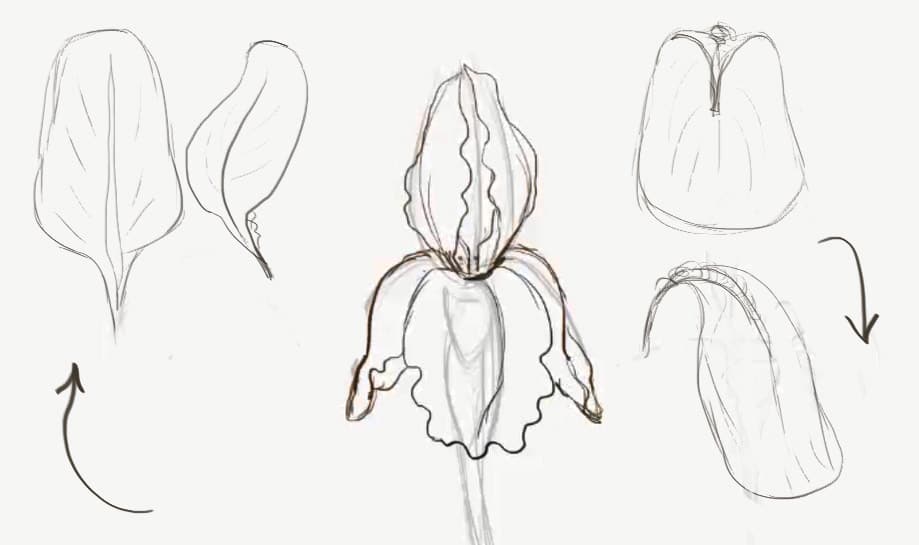
Slightly outline the shape of iris petals. The picture below shows what shape the iris petals, which are directed upwards and downwards, usually get.

The iris petals are usually attached deep in the flower bowl. The lower part of a petal is thin and covered with fur and pollen.
At the following stage of our free art lesson online we are going to outline the shape of iris petals. If you are good at drawing simple leaves, you can make the flower more interesting and draw the iris with «curly petals».
Create a slight sketch of all the irises.
Improve and Add the Details
When all the iris petals are outlined, you can add some details. Now you can draw and improve more hardily, using a soft pencil.

Show the direction of folds and bends on the petals, making light strokes. There is the saddle-backed pivot in the center of each petal – it should be also marked on the painting. Add the shadows in the depth of a flower and under the leaves.
The leaves of irises as well as tulips wrap the stem and have the elongated shape and pointed tip.
The following picture shows the branch of irises.

There are several flowers located on one stem. The first flower is blooming, the second one has almost ceased blossoming, the third one has just come into blossom and the other flowers are in the buds.
Video Tutorial – How to Draw the Irises Step by Step
To make the whole process clearer, let`s watch a short video tutorial and draw the irises together.
If you like irises and want to draw them with acrylic paints, watch our acrylic painting lesson video and draw the painting with your own hands.
I hope this painting art lesson has been useful and interesting for you.
Create wonderful paintings together with us!
How to Draw an Iris Flower Step by Step
Source: https://artanddrawing.com/drawing/how-to-draw-irises
0 Response to "How to Draw an Iris Flower Step by Step"
Post a Comment